
Showing 3 jobs, the more jobs
Showing 3 jobs, the more jobs

Showing the edit button in the Views listing page

Showing preview results

Highlighting the Attachment display tab

Field settings

Attachment style settings

Attachment row style settings


Title field in View
More Jobs\

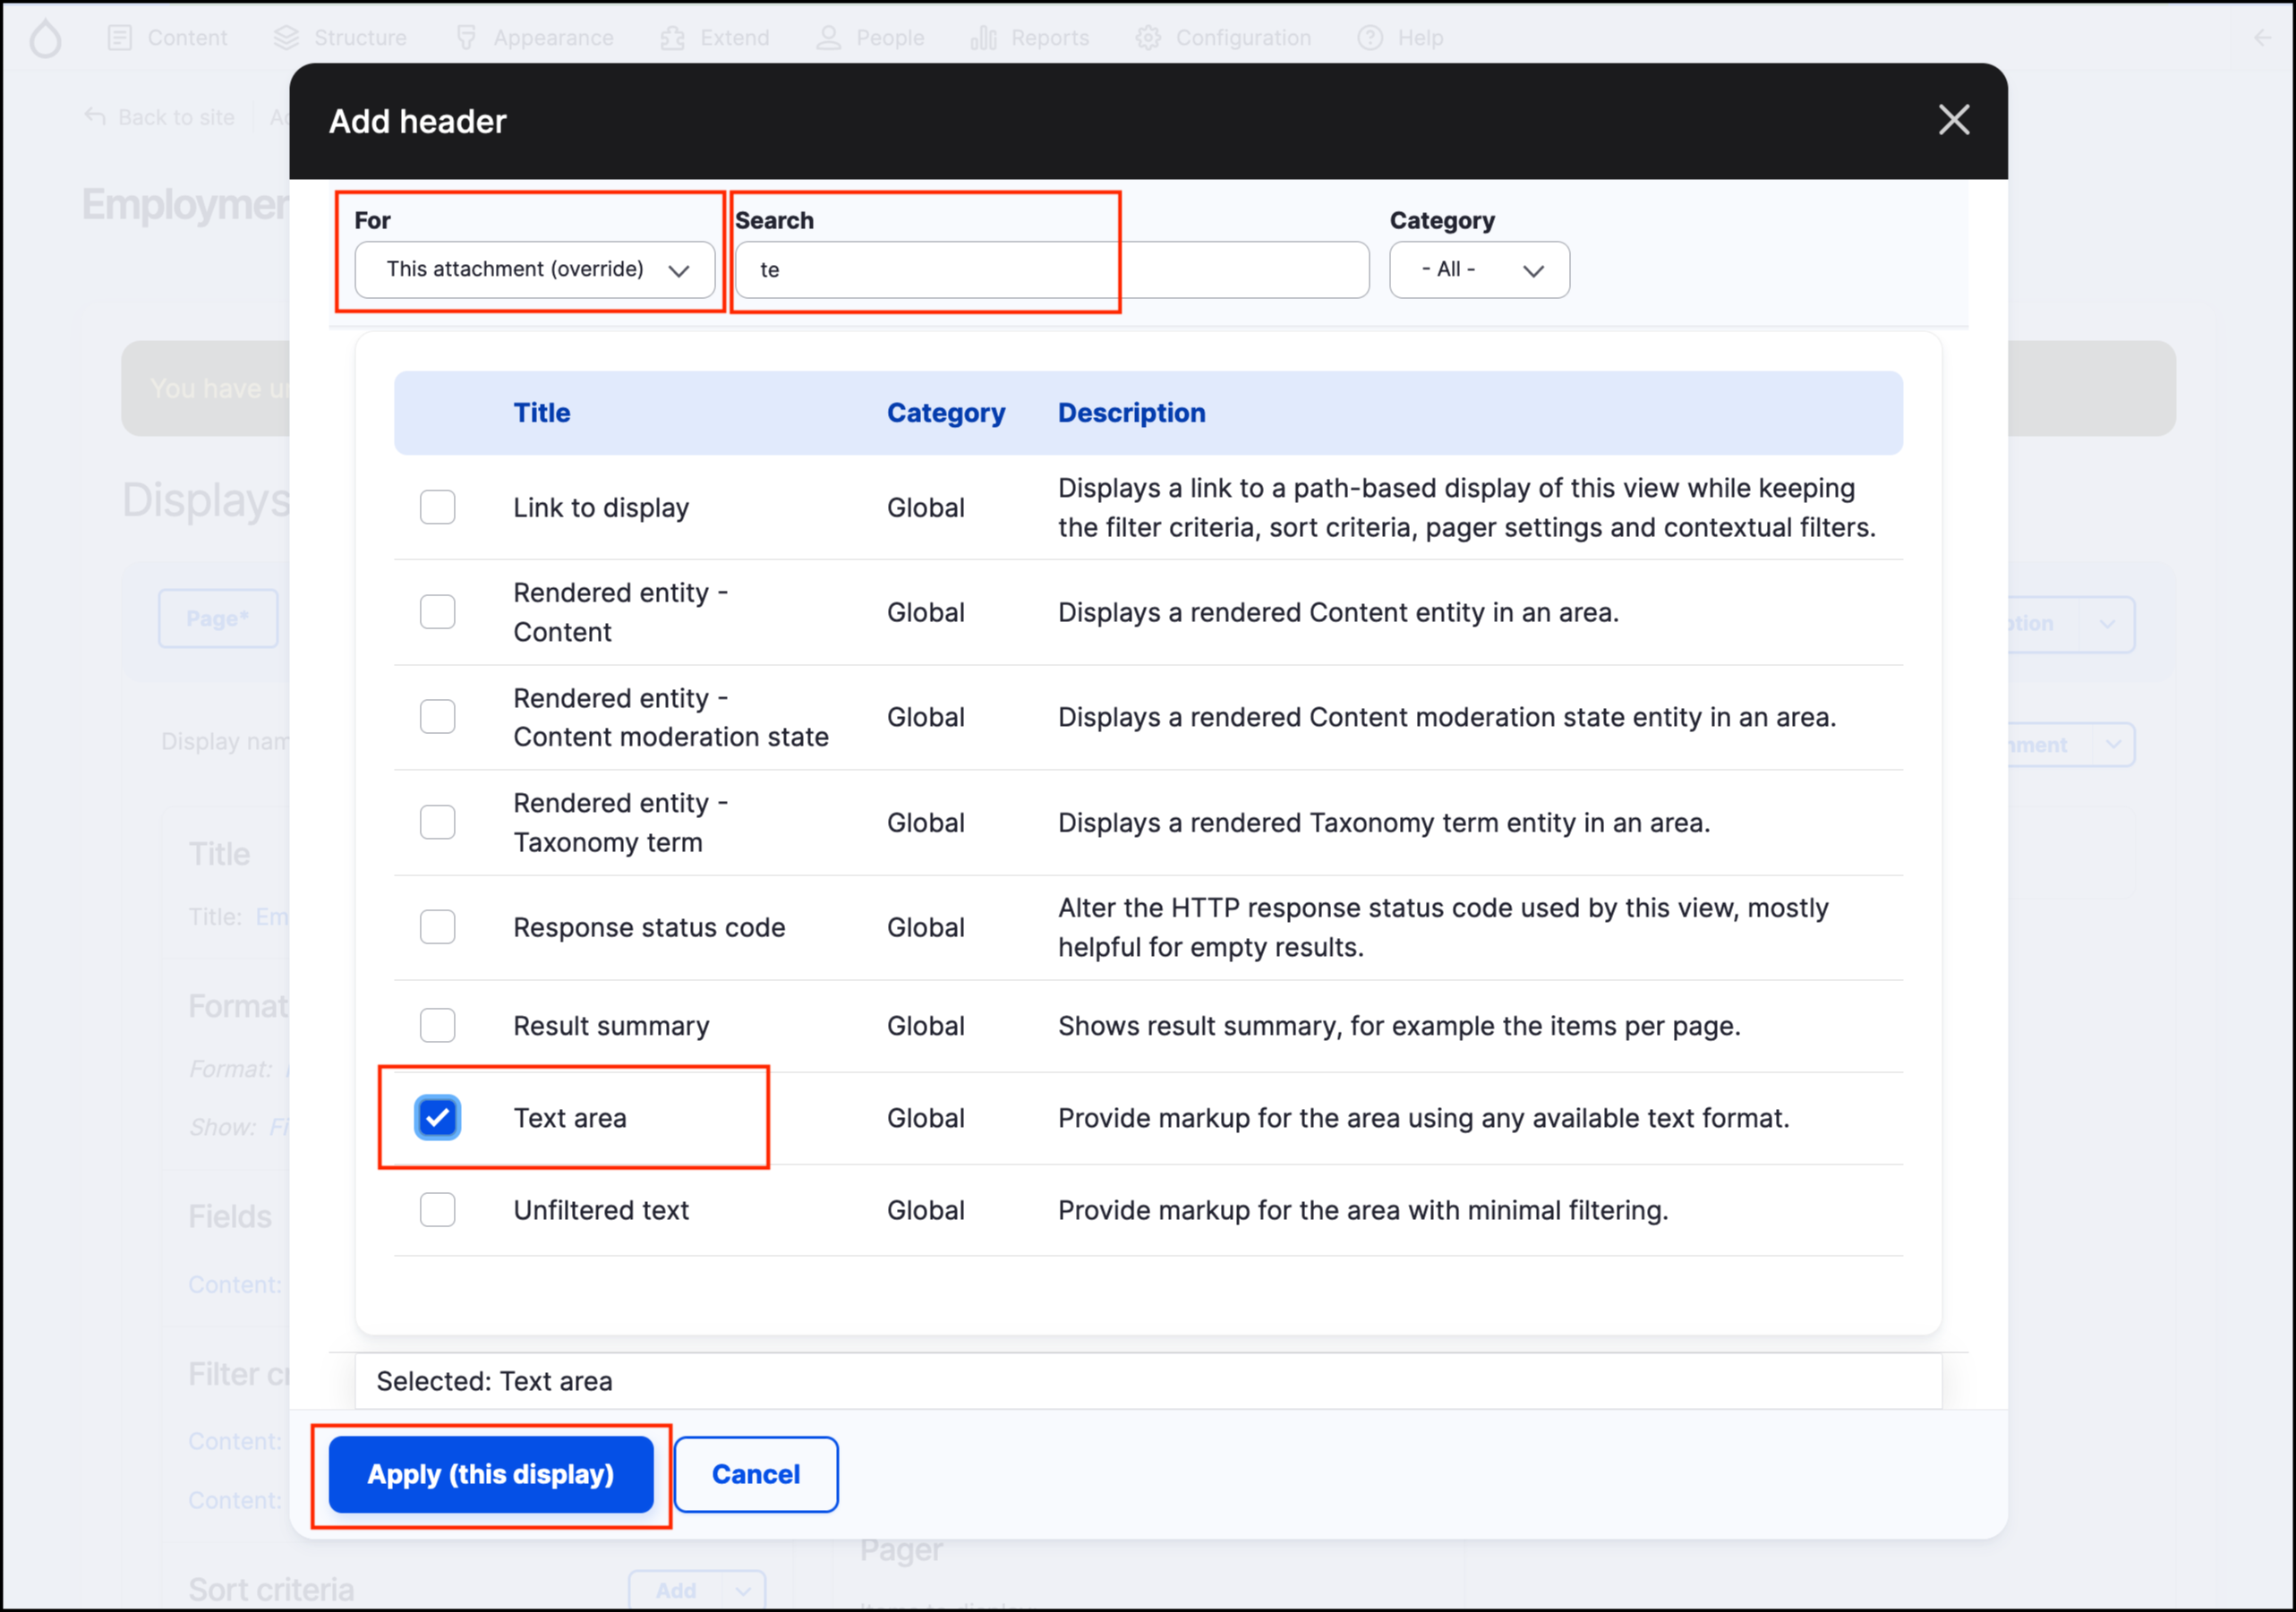
Adding content to global text area

Preview of new header

Pager options settings
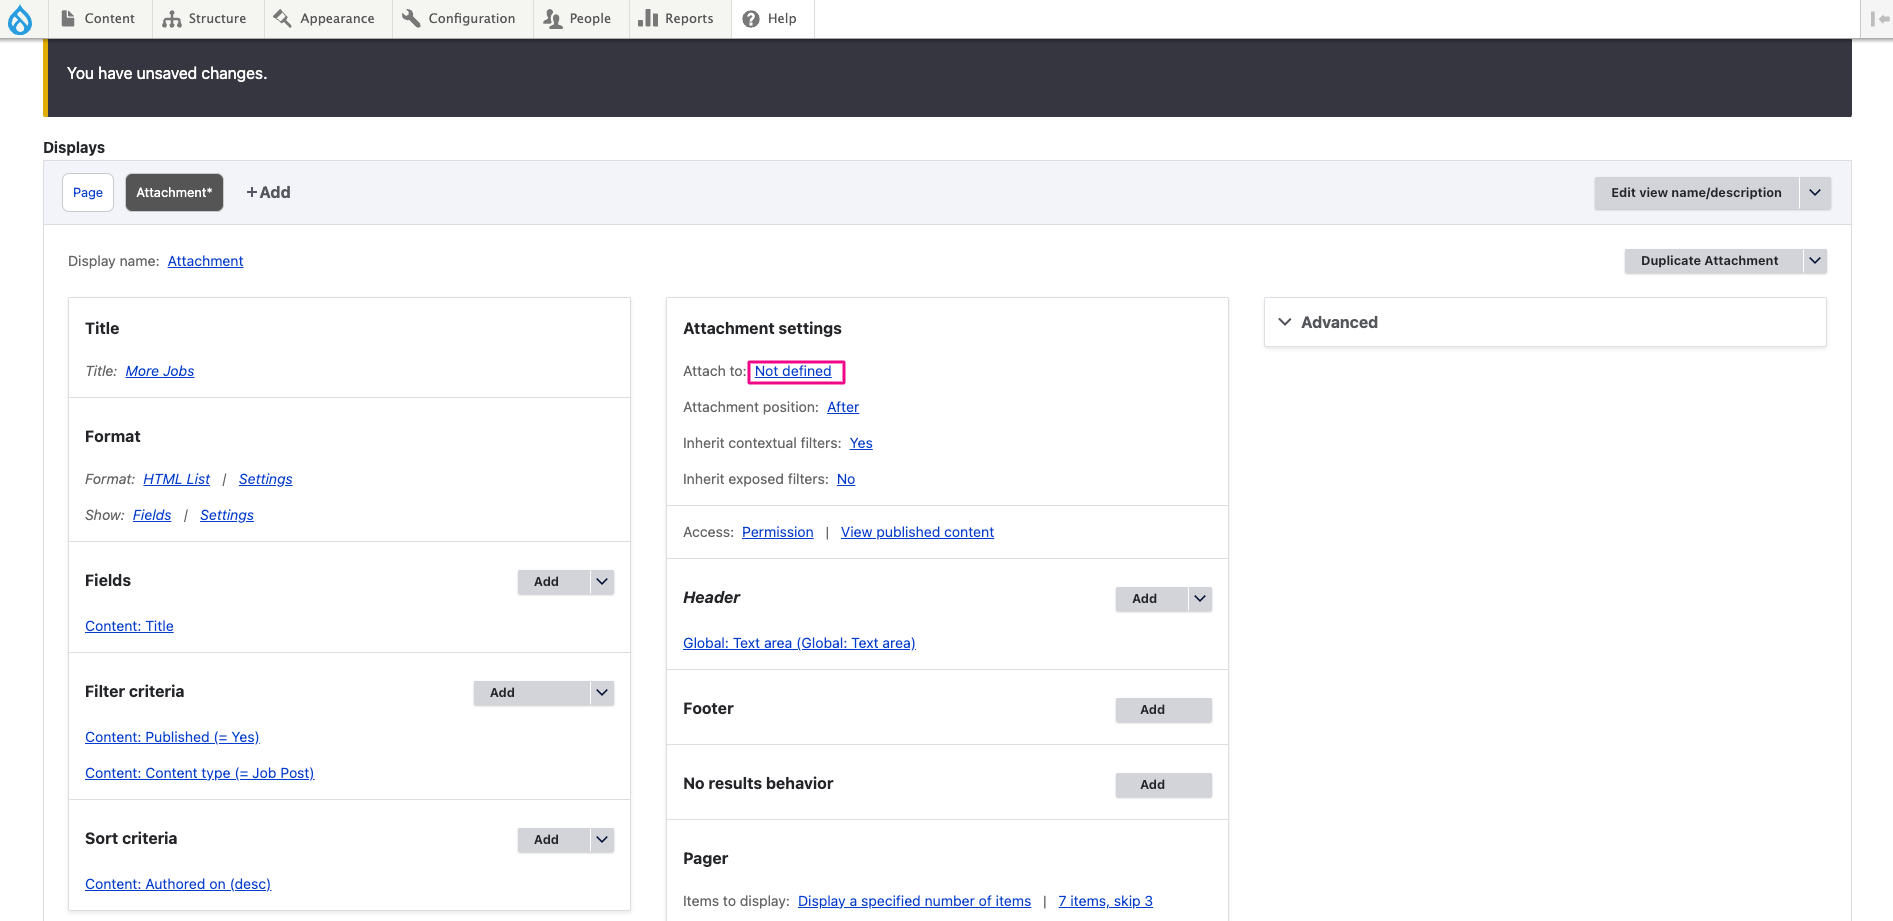
Attach to "not defined" link

Select Page

Final Views page